Enabling Wishlist through Site Menu
The Wishlist Hero module, by default, gets added to your Shopify site as a floating button. This becomes your launch point to access the wishlist and can be placed in 4 different positions. You can specify this placement through Wishlist Hero Admin.
However, depending on your site theme or your site layout, you might feel that a floating button is not ideal. If you prefer a less disruptive user experience that still allows your customers to navigate to the wishlist, you might want to add it as a static menu item.
- In Wishlist Hero Admin, click on Customize Appearance and choose ‘As a menu item’ as your launch point type. Click on Save Settings. The rest of the steps to complete setup need to be done through your Shopify console and can be accessed by clicking on the link that says ‘Open’.
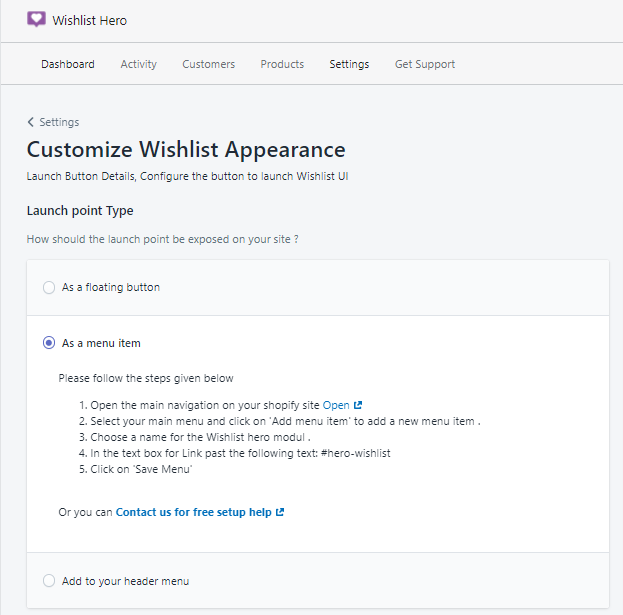
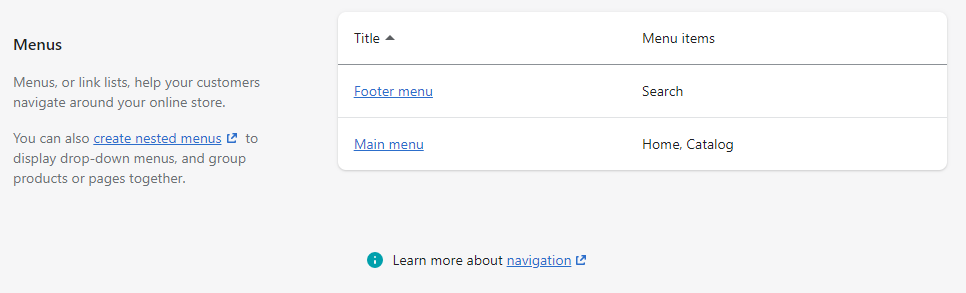
- If you are already in your Shopify Console, you will find the option to set up your menu items under the Navigation tab under Online Store on the left.
- Choose ‘Main Menu‘ under Title, that will open a new page.
- Click on ‘Add menu item‘.
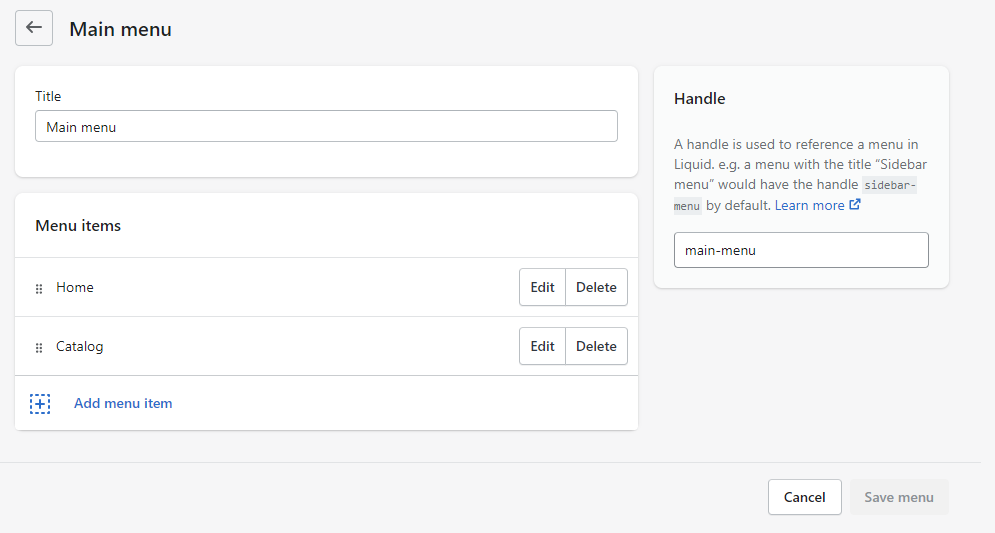
- Add the name for your wishlist module and in the text box for the link, paste this text: #hero-wishlist

- Once you have added the menu item, click on Save Menu and you’re done!
Note that you’ll need to save your settings in Wishlist Hero Admin to make sure the default floating button no longer appears. The new added menu item will then become the primary access point for the Wishlist Hero module.
Please feel free to reach out to our support team should you have further questions.