Looking for help?
Place the Wishlist Hero icon in header
Online Store 2.0 theme – Using Theme Customizer
When applicable, this is the preferred method, steps are as per the screenshot below
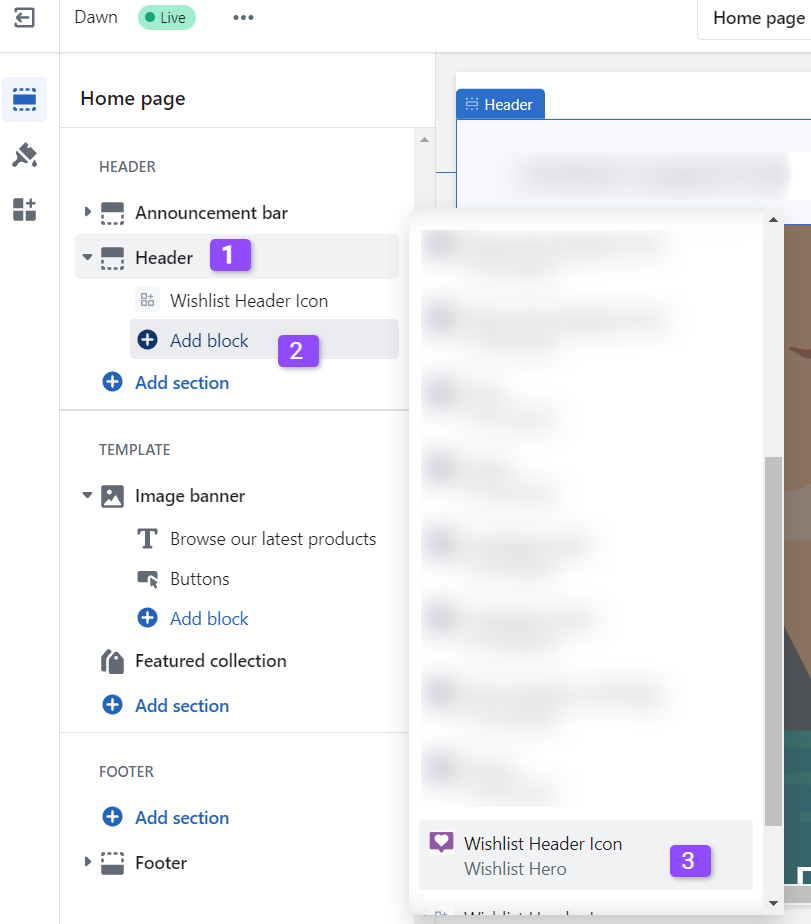
- On your store admin screen, Go to “Online store” > “Themes“
- Click on the “Customize” Button
- Go to the Header section, expand then click on “Add block“
- Add the “Wishlist Header Icon” block

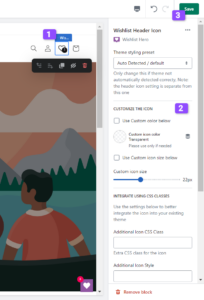
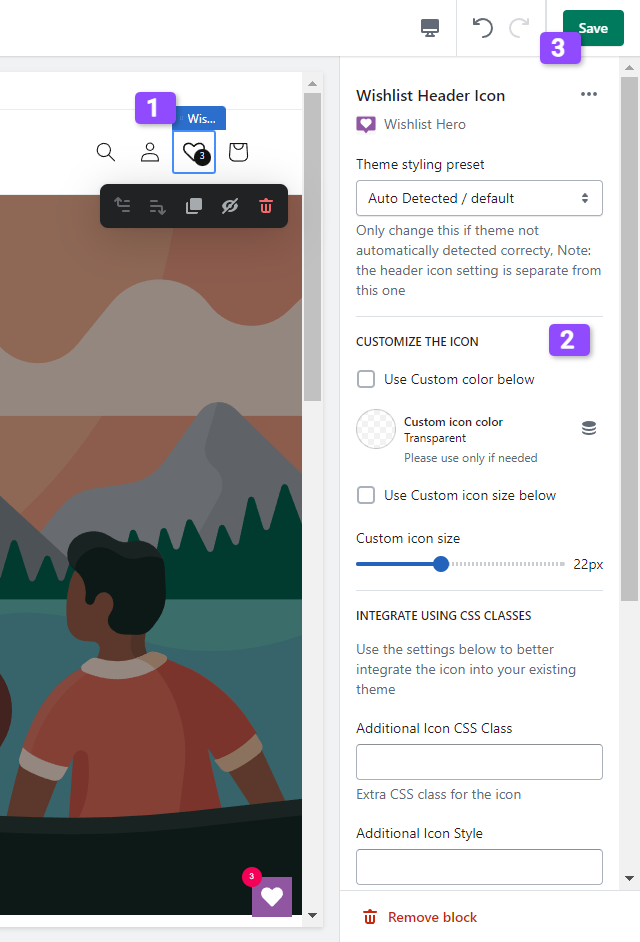
- Configure the Header icon to better fit your store style from the section itself
Note: Some themes do not yet support adding app blocks in the header section. In this case please contact us for help or use the same approach as Online Store 1.0 below
Online Store 1.0 – Using automatically added snippets:
Wishlist Hero adds a snippet during installation that you can use for this purpose. Instruction for most themes are:
- On your store admin screen, Go to “Online store” > “Themes“
- Check the theme you want to edit, and click on the “Actions” button, then on “Edit Code“
- Now you are on the Theme files editor, you should look for where you want to place the wishlist icon in header. In most cases that is “
header.liquid“ - Start editing the file, search for the cart code. right before the cart please place the following snippet.
{% render 'wishlisthero-header-icon.liquid' %} - Save the file and preview in store.
- Optional: If you want to edit how the icon looks, you can always add any styles you want to add in “
snippets/wishlisthero-styles.liquid“